The 411 on Valentine Mailboxes with
Sizzix eclips and SVGcuts
Oh, I had a great time with this project! What made it possible? The Sizzix eclips running ecal software! My little guy's preschool class was planning on decorating mailboxes for their Valentine's Day Celebration. After seeing the Valentine's Mailbox SVG Kit Preview from SVGcuts, I knew I wanted to create thses with my Sizzix eclips electronic cutter to share with the class.
Check out the Valentine Mailbox Preview Video:
Each part of the kit is in it's own file, so I took an hour to configure the complete project into a 5-page template using my Craft Edge ecal software for the Sizzix eclips. It was so nice to be able to copy and relocate the items I wanted to cut in order to maximize the cutting area on the paper!!
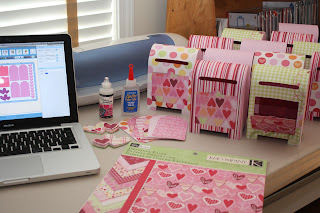
I made sure to keep in mind that I was using patterned paper, so I would make sure the items I needed in the template were "right side up." The template I created (showing page 4/5) included enough pieces to create 2 mailboxes:
OK, template prepared, now for the supplies:
I knew the mailboxes would be opened, so I wanted to use heavy, double sided paper. Michael's had just what I was looking for - K&Company's 12x12 Specialty Paper Pad by Kelly Panacci.
I needed 12 mailboxes and it took two hours to get all the pieces cut and stacked using my ecal software on my MacBook connected to my eclips. Pretty quick, considering 30 sheets of paper were sliced & diced! Paper was flying!
Next, assembly:
SVGcuts offers great assembly tutorials for many of its projects, this one included:
I was very happy I took the advice on the video to use glue for adhesive, rather than tape, as it gave a certain amount of "open time" to make slight adjustments. However, in an effort to cut down on drying time, I used different options than the white craft glue they used.
For the long, straight junctions, I used Zip Dry Paper Glue. It dries quickly (but not TOO quickly), clear, and smudges can be rubbed off.
For the arched pieces (a total time killer) I really wanted to pick up the pace, so I used a thin application Ranger's Inkssentials Glossy Accents. While mostly associated with creating glossy embellishments, this is one fast-drying glue! Plus, it has a fine, flexible tip that is perfect for getting to tight spots.
The project took a total of 4 evenings to make 12 mailboxes. Would I take up this project again? YES!
Many thanks to all the generous teachers who create these wonderful, enriching events for our children! We appreciate your efforts!


No comments:
Post a Comment